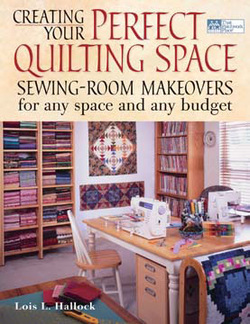
Fabric folding is described on pages 28 and 31 of my book "Creating Your Perfect Quilting Space". Thank you Sandy for asking!
 Fabric folding is described on pages 28 and 31 of my book "Creating Your Perfect Quilting Space". Thank you Sandy for asking!
1 Comment
The inventions of some tools have been absolutely ground breaking for quilters. The rotary cutter, for example, changed the way quilters cut their fabric. The new way meant less time cutting and more time sewing. More time sewing directly equated to more quilts or more pieces in the quilts produced. The rotary cutter also set a higher standard for accuracy and the quilted blocks matched more accurately, giving new quilters a quicker satisfaction with their new hobby. I know I would not be quilting today if not for the invention of the rotary cutter.
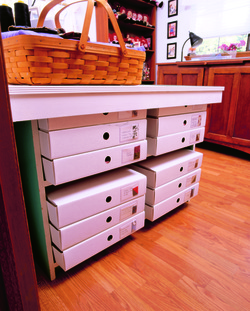
As in many new inventions, there are others that come along afterward to improve on the original. As an engineer, I believe there is always the possibility of doing better on a second, third, or fourth generation of a product. For that reason, I never buy a car in its first model year; I like to wait until the “bugs” are worked out. The darling invention of the quilting world, the rotary cutter, has been redesigned to include a grip with a more ergonomic orientation. I present to you the Martelli Ergonomic Rotary Cutter. This cutter is available in both a left and right hand format and uses the same blades as other cutters. However, it has a very different orientation in your hand from your standard Olfa or Omnigrid Cutter. The traditional rotary cutter has you extend your lower arm and twist your wrist with your thumb on top. This is an unnatural position and puts your body at risk for injury due to the extra twist in your wrist. As I have presented in previous newsletters, having a cutting surface that is 6” below your elbow can help the ergonomics of using a standard cutter. This gets you the right leverage and keeps you from hitching your shoulder up while trying to twist your wrist and cut. In contrast, the Martelli Rotary cutter is held like you hold a bicycle handle bar, with your palm facing down (no unnatural twist). The only difference from holding a bicycle handle is that you should extend your index finger along the spine of the cutter, which will give you more stability and control. It will feel awkward the first couple of times you use it, but stick to it and you will be sold forever. The cutter blade is held closer to the center of your hand and quickly begins to feel like an extension of your body. You get leverage on the point of contact without straining your wrist, arm and shoulder. You will also tend to put less side load on the cutter trying to keep it next to the ruler, which equates to less ruler slip. What you will also find is that you can work at a much higher surface height for cutting. The perfect cutting surface height with a Martelli cutter is just the blade height below your elbow. This also helps my eyesight, since my glasses focal length is set for my sewing machine needle ergonomics and the neutral position for sewing and cutting are now the same with respect to my upper body (see newsletter # xX for Sewing machine needle focal length adjustment). Any rotary cutter can be dangerous. You probably know a quilter that has gone to the emergency room to get a slice stitched up, and may be unlucky enough to be that quilter. Rotary cutters come with guards that should be locked closed every time we finish a cut so as to reduce the likelihood of injury. The Martelli has a simple finger flip to close which quickly becomes second nature. To open, the cutter need simple to be slid backwards on the mat and the friction opens the spring loaded guard. Another great ergonomic tool I found recently is the Wahl Electric Seam Ripper. At first I thought it was funny as this tool is identical to my son’s moustache trimmer (and made by the same company). Using a seam ripper to “un-sew” is an extremely poor ergonomic activity with a lot of fine motor operation, wrist twisting, and close eye strain activity. It is also extremely unsatisfying since you have to undo and redo all that work! The electric seam ripper is fast for removing long strips in just seconds. It took me a couple of runs at it, but it was almost too simple once I got it. You hold the two ends of fabric apart with the seam dangling vertically. Then turn the seam ripper on and run it straight down the seam. The seam just magically opens up; finishing in seconds what would have taken five minutes or so to open. It doesn’t touch the fabric on either side, just the threads get cut. I am sold on this new product and have added it to my website for your purchasing convenience. Considering ergonomics in all you do is one way to improve your comfort and efficiency. You have probably read in previous newsletters, about choosing table heights and adjusting sewing chairs. Investing in ergonomics will reap untold rewards. I want to leave you with the most recent email I received from a customer: “FYI, I recently quilted a large quilt and I was in my chair for hours on end with the back locked in a forward position as you recommend. In the past, my back, shoulders and neck would have been sore at the end of a quilting day, but with my new chair I felt GREAT. No stiffness or soreness at all. I am so happy I made the investment! Love your newsletters!” Lynn  If you call your UFOs - "Works in Progress", are they progressing when you are not even touching them? I like to think so. It makes me feel better even if it's not true. I also like to think that if I store them neatly, then maybe they don't really have to be finished. My project boxes come in bundles of 50 that are flat and store in a relatively small space until you need to fold them into a box to store a small or medium project. A large project can be stored in two matching boxes, with back and binding fabric in one box and block fabric in the other. The boxes are not acid free, but with one layer of acid free tissue paper they work the same. I counted my Project boxes and made a list turn in to my Quilt Guild to join their UFO challenge. I have 18 currently active WIPs. My goal this year is to finish one per month and post them here. January's Jelly Roll Race Quilt was already finished and sent to the quilter (see photo below). Fabric is the whole reason I make quilts. Now that sounds like an obvious statement, like of course you need fabric to make quilts! But that isn’t what I mean. What I mean is that I love fabric and quilts are the manifestation of that love. I could just collect fabric for the love of fabric and not bother with the second step of making the quilt. It sure would be a lot less time consuming. But what good is love if it is not shared?
What is fun about being a part of a quilt guild is our shared love. We ooh and ahh over each other’s fabric choices, block placement, and quilts. We get excited about taking classes, learning new techniques, or just gathering to talk about the new quilt shops we visited. There is nothing better than a whole retreat weekend with fellow quilters. It never grows old. We come home with spirits refreshed, hearts repaired, and the ability to face our life with replenished energy and renewed joy. What I find confusing when I enter many quilt studios is the lack of focus. Where is the fabric? If “for the love of fabric, I quilt”, why isn’t the fabric taking center stage? Or if the fabric is visible, it is in teetering piles and squashed in boxes and bags all over the room. Is that how we treat something we love? Well I am here to offer you solutions and hope for a better storage method for your fabric. Let’s make use the most use of shelves, bookcases, and closets by folding your fabric using a ruler. I like the 8 ½ “ x 24” ruler – roll the fabric up on the ruler like the ruler is a bolt form from the fabric store. Slide the fabric off halfway, fold the fabric back onto the half on the ruler and slide it off the rest of the way. The clean front edge is the side that faces the room and is lined up on the edge of the shelf. So you say, that is crazy! I don’t have time for this! Try it – you will like it and you can do it mindlessly. Bring a bag or box of fabric to the TV each evening after dinner. Fold one bag or box while watching that night’s favorite show. Carry the folded bag or box back to your studio before bed each night. When all is folded, put the fabric on your shelves so you can see it. Half yard pieces and fat quarters can be folded with the smaller 4” x14” ruler and put in small bins that act as drawers when stored on the shelf. Look at the photo for a great idea from Kate Hunter for finding extra volume on her shelves by using racks meant to increase plate storage in kitchen cabinets. It’s all about volume. Fabric when folded, takes up less space, which makes room for more fabric. So that solves the practical storage problem. But the even bigger benefit of the folded fabric is the positive energy and renewed quilting passion it gives back to you when handle it lovingly and store it beautifully. When I make a quilt for someone, there are hours and days of thinking about, cherishing, and holding dear that person in my heart. The fabric that I love is combined with my love for them to create a gift that will wrap them in more than just the warmth of the quilt – the spiritual gift of my love resides there until the quilt, like the velveteen rabbit, becomes real. Happy Organizing! |
Author
Archives
March 2014
Categories |